The Attendance Records feature lets you upload a CSV file and automatically generate and email CE certificates to attendees. Follow the steps below.
Step 1: Open Attendance Records
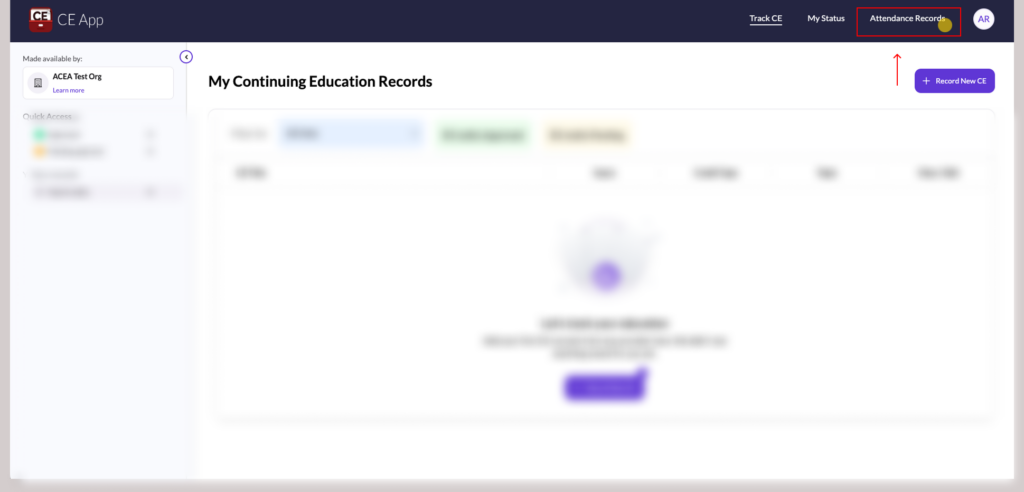
From the top navigation menu, click Attendance Records.
Step 2: Create a New Record Set
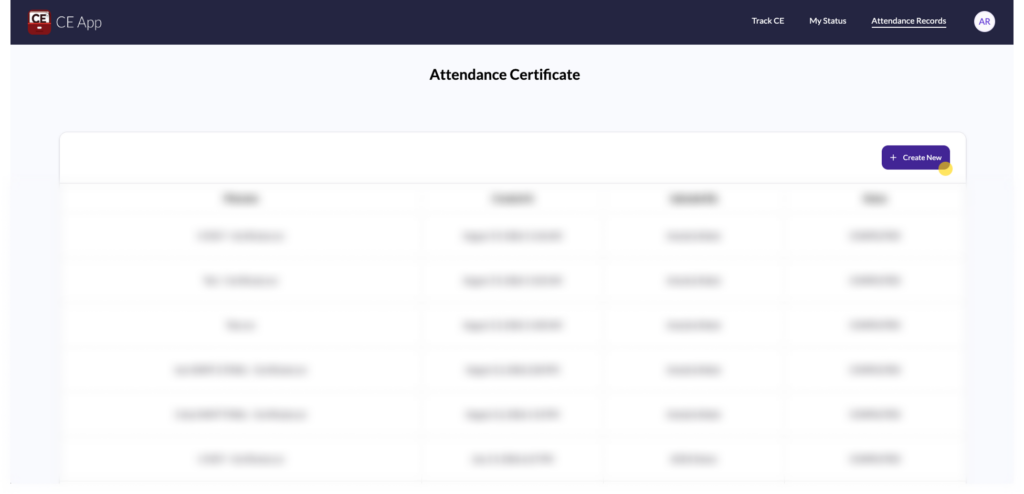
On the Attendance Certificate page, click the + Create New button in the top right.
Step 3: Upload Your File
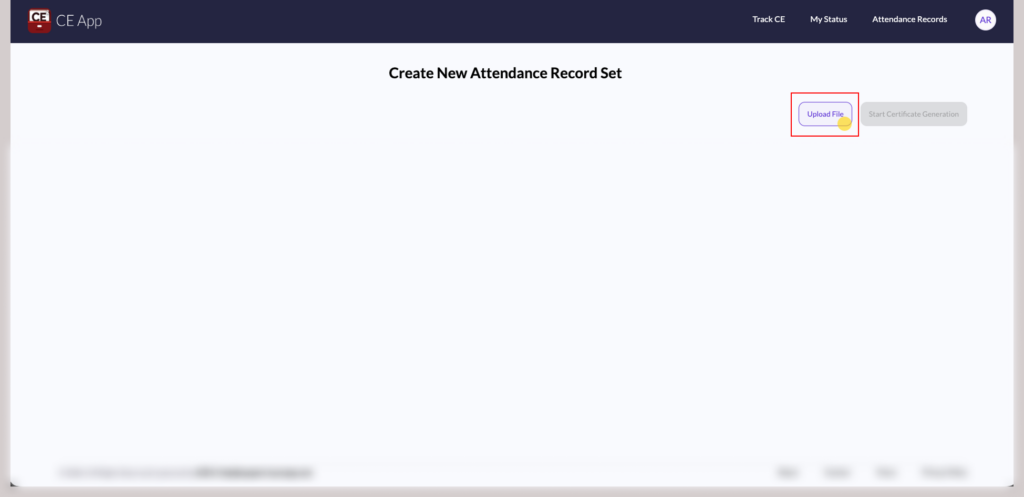
On the Create New Attendance Record Set screen, click Upload File and select the CSV file you want to use.
Step 4: Set the Defaults
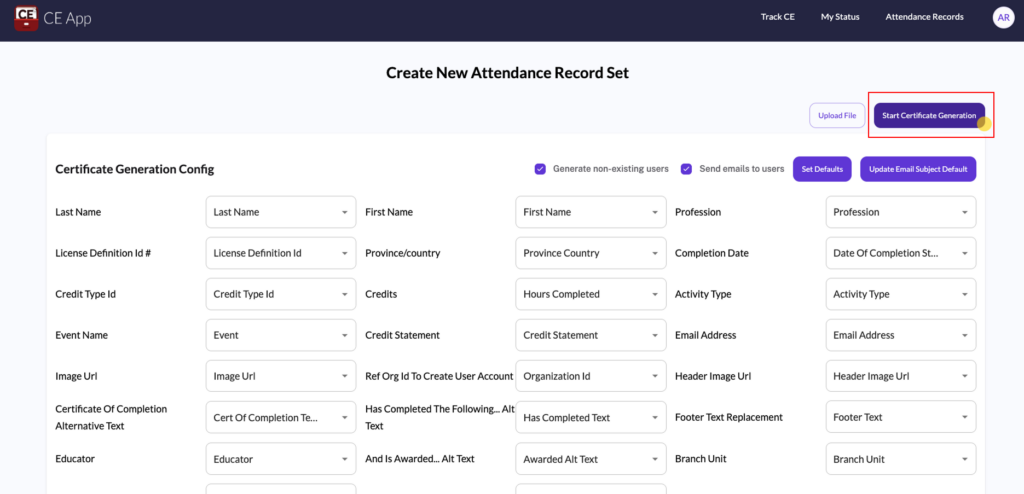
Once your file is uploaded, the Certificate Generation Config will appear with your column mappings. Click Set Defaults to apply the standard field mappings.
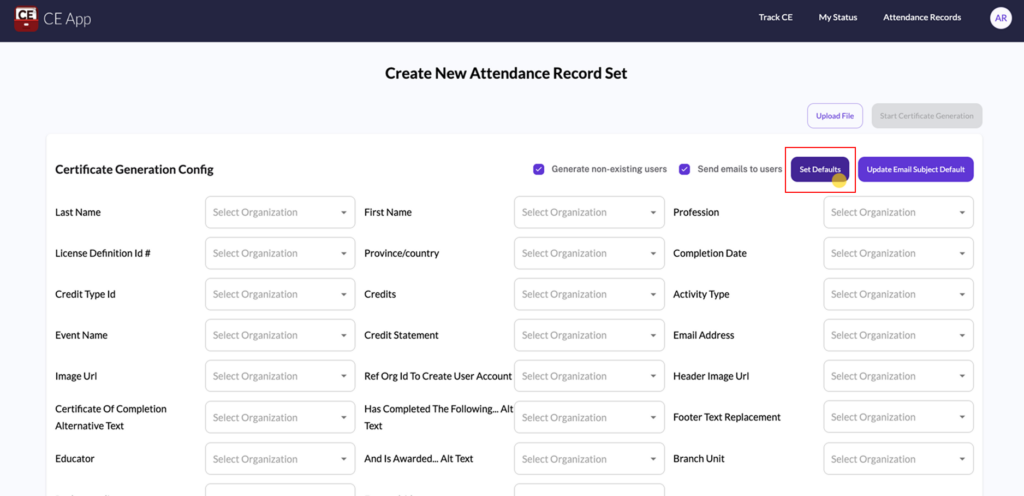
Confirm your options at the top of the config:
- Generate non-existing users — creates accounts for attendees who aren’t already in the system
- Send emails to users — emails the certificate to each attendee
Step 5: Start Certificate Generation
Click Start Certificate Generation in the top right.
Step 6: Confirm the Email Subject
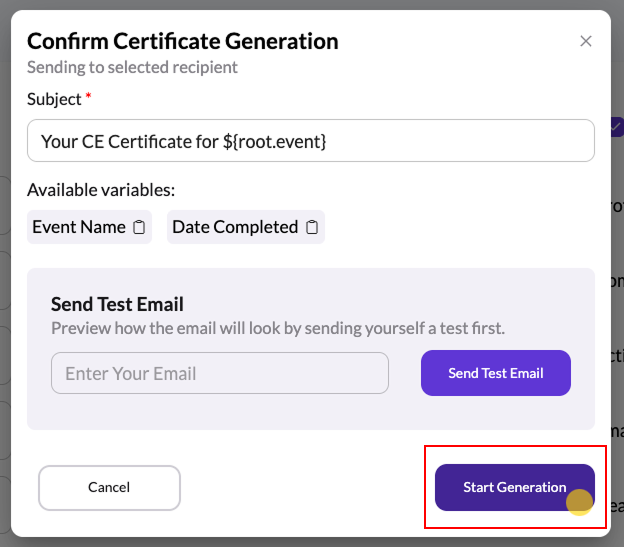
A Confirm Certificate Generation pop-up will appear. Here you can customize the subject line of the certificate email.
A default subject is already filled in (e.g., Your CE Certificate for [Event Name]).
To customize it, use the Available variables shown below the subject field — Event Name and Date Completed. You don’t need to type these variables manually. Just copy an available variable and paste it into the subject line where you want it to appear.
Example: Your CE Certificate for [Event Name], completed on [Date Completed]
(Optional): Send Yourself a Test Email
Before generating certificates, you can preview the email. Enter your email address in the Send Test Email field and click Send Test Email to see how it will look.
Start Generation
When you’re ready, click Start Generation.
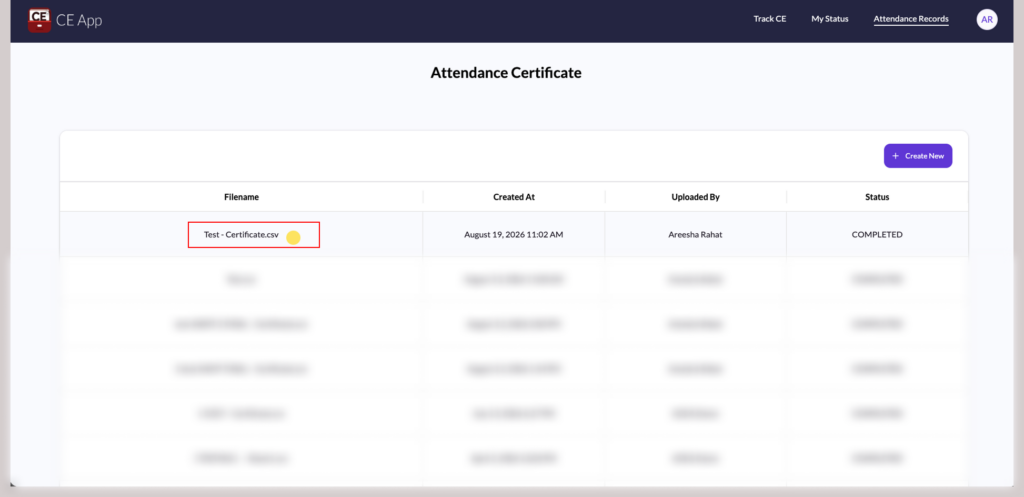
Step 7: Open Your Record Set
Once generation is complete, your file will appear in the Attendance Certificate list with a COMPLETED status. Click on the file name to open it.
Step 8: Review Records and Resend Emails
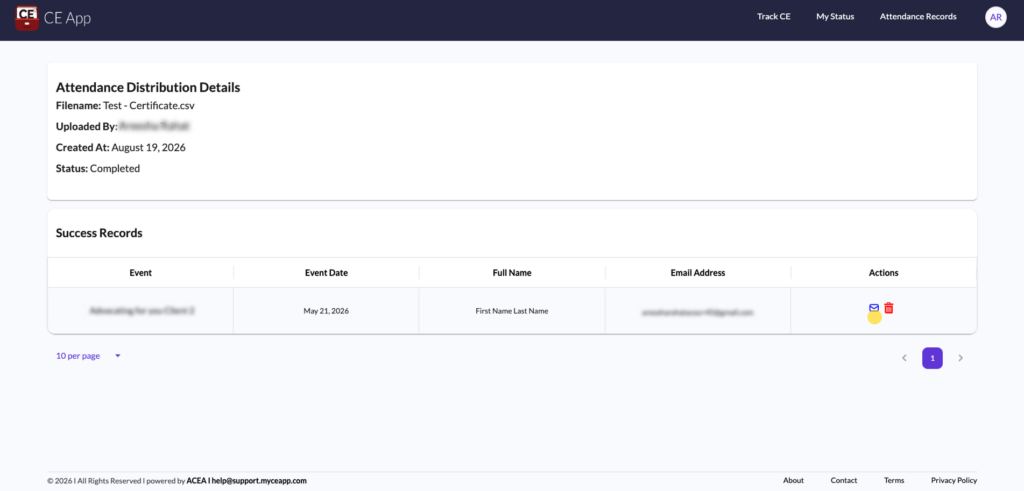
On the Attendance Distribution Details page, you’ll see the Success Records table with each attendee’s event, date, name, and email.
Under the Actions column, you’ll find two icons:
- Email icon — resend the certificate email
- Delete icon — remove that record
An email is sent automatically during generation. If an attendee didn’t receive theirs, click the email icon to resend it.