Follow this step-by-step guide to securely add other login details, such as for CE providers, certification providers, and other important third-parties, into your account within the CE App.
Who has access to this and why use it? CE App Elite™ subscribers can automatically:
- Synchronize CE completions from some CE providers into the CE App
- Report CE completions from the CE App to your credentialing bodies (such as a certification board).
This allows you to have one easy system to manage all of your CE instead of having to track it across multiple places. Through this, you let our AI-powered software and human-powered support team do the work for you!
Step 1: Log in to the CE App
Start by Sign In to your CE App account with your registered email and password.
Step 2: Access Your Account Settings
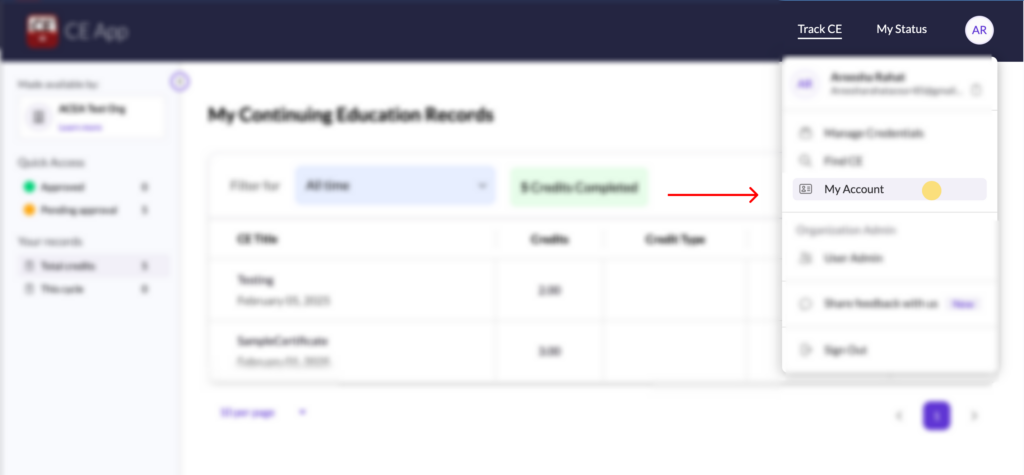
- Once you’re logged in, click on the profile icon located in the top-right corner of the screen.
- From the dropdown menu, select “My Account.”

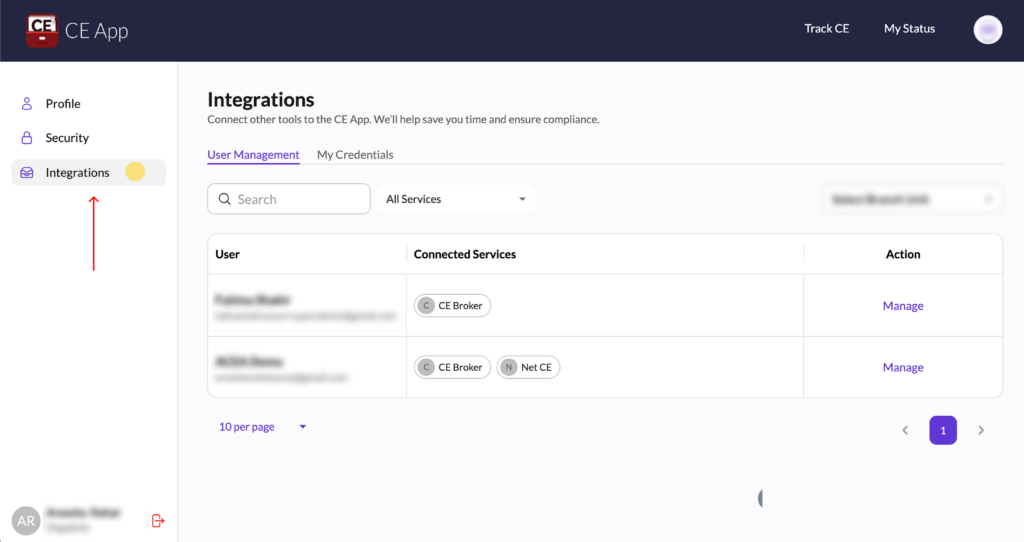
Step 3: Navigate to Credentials
- On the My Account page, locate and click the “Credentials” tab.
- On the Credentials page, you’ll see a list of available integrations.
NOTE: If you do not see this option on your account, then you currently do not have access to this feature. You can upgrade to CE App Elite™ here or contact your organization’s admin/manager to upgrade your account.

Step 4: Add Your Certification Body, CE Provider, or other Credentials
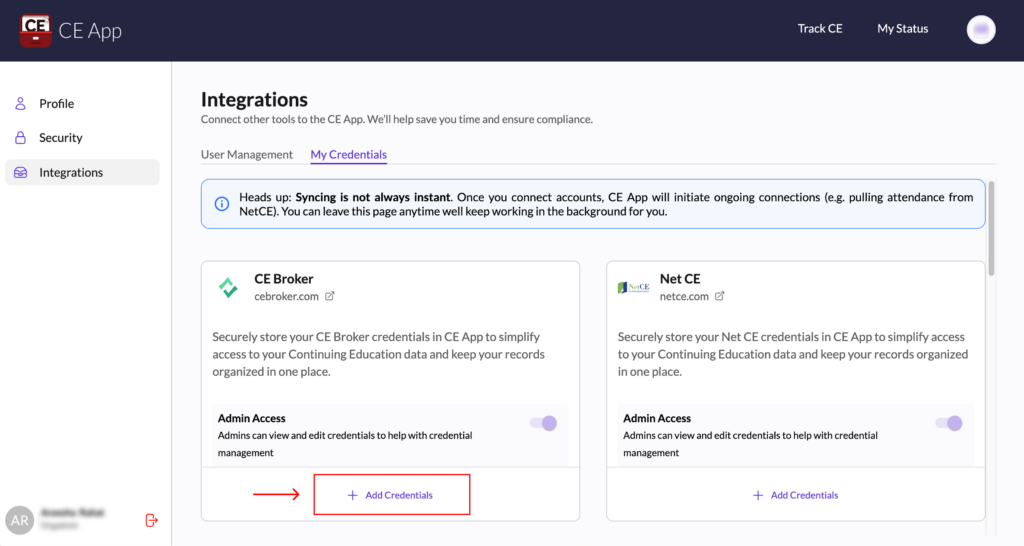
- Find the specific third-party Certification Body, State, CE Provider or other relevant third-party integration you want to connect to from the list.
- Click on “Add Credentials.”

Step 5: Enter Your Login Information
- A form will appear where you can enter your username and password for CE Provider or third-party site.
- After entering your details, click “Save Details.”
🔒 Security Suggestion: Before adding your credentials here, change your password on the third-party site to something completely unique to that website. Never use passwords that you use on other websites if you can avoid it. You can use a secure password generator such as this one to generate a secure, unique password for your protection. Once your password is changed on the other site, you can then add it into the CE App.

Your details here are then stored securely with advanced encryption to ensure your information is kept confidential. Depending on the settings for your organization, this information may then be shared securely with CE App administrators and our automated software systems to support you in managing and synchronizing data with those third-party accounts.
Once your information is successfully saved, a green display of ‘Connected’ will be shown, indicating the connection has been established. The system will now show that your credentials are connected.
Then you’re done!
Now you have a centralized system with the CE App to manage your continuing education with this third-party, allowing our AI-powered software and human-powered support team do the work of tracking CE for you.
Managing Your Credentials
- To view your saved credentials, click “View Credentials.” Your ID and password will be displayed.
- To edit your credentials, click “Edit Credentials.” This allows you to update your username or password as needed.

